
Step 1:
Make a new 256x256 image in GIMP and go to Filters > Render > Pattern > Qbist.
           _              _
 _ __ ___ (_)_ __ ___  __| | ___
| '_ ` _ \| | '__/ _ \/ _` |/ _ \
| | | | | | | | |  __/ (_| | (_) | is teaching you
|_| |_| |_|_|_|  \___|\__,_|\___/  about backgrounds
Here's a tutorial on how to make backgrounds like mine using GIMP. In particular, the background to this page is the same one that is created in the tutorial images. Click each thumbnail to view it up close.
If I'm honest, this tutorial is for myself as much as it is for you, lol.
Let's begin:

Step 1:
Make a new 256x256 image in GIMP and go to Filters > Render > Pattern > Qbist.

Step 2:
This will open the Qbist window. It will start with a fairly simple 3x3 grid of patterns by default. The center pattern is the currently selected one.

Step 3:
Click on the 3x3 grid, selecting which pattern looks most interesting. Clicking the center pattern will shuffle the surrounding patterns if you don't like any. Press OK when done.
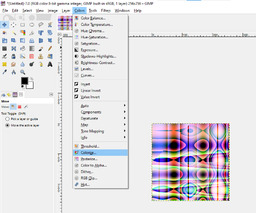
Step 4:
To normalize the colors into a single hue, go to Colors > Colorize.
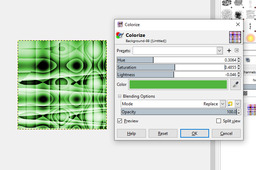
Step 5:
Select a color that looks nice with the sliders. Press OK when done. You can additionally use the Blending Options to adjust the opacity to let some of the psychadelic color shine through, and adjust the blend mode to change how it shines through if you want.

Step 6:
Go to Filters > Distorts > Ripple.
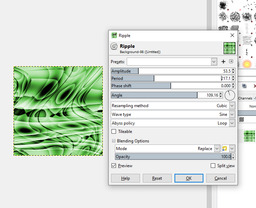
Step 7:
Adjust the Amplitude, Period, and Phase Shift to your liking. Adjust the Abyss Policy to be either Clamp or Loop, depending on which you prefer the look of. Clamp will use the color that was at the edge of the image, while Loop will wrap around to the other side.

Step 8:
To adjust the brightness (remember, this is a background, text goes on top of it!), go to Colors > Curves.

Step 9:
Click to add points beneath the diagonal line to darken the image. Play around with it as you see fit. Click OK when done.

Step 10:
Go to Filters > Map > Tile Seamless, which will make the image tileable.

Step 11:
Tile Seamless has no real options, so just hit OK here.

Step 12:
Go to Filters > Map > Tile, which we'll use to make the image larger.
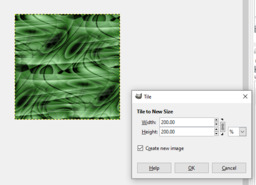
Step 12a (oops):
Change the units to percent, and enter 200%. Press OK when done.

Step 13:
Create a new layer (Layer > New Layer). Make sure it's filled with transparency and is the same size as the image. Press OK when done.

Step 14:
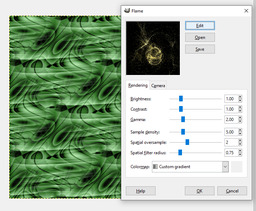
Go to Filters > Render > Fractals > Flame. Make sure the new layer you just made was selected.
Step 15:
Click on Edit to alter the flame pattern.

Step 16:
A 3x3 grid like with the Qbist filter will appear, and it works the same way. Select a flame pattern you like, then press OK on both dialog windows when done.

Step 17:
With the flame layer selected, go to Colors > Colorize and adjust the flame color to your liking.

Step 18:
Now, go to Image > Merge Visible Layers. The next few steps won't work right otherwise.
Step 19:
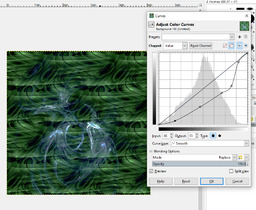
Give the image another curves adjustment (Colors > Curves). Once again, remember: text goes onto the background if you use it on your webpage, so you need to make sure it contrasts well against that text.

Step 20:
Perform one more Filters > Map > Map Seamless. At this point, the background is done, but I perform two other steps:

Step 21:
Go to Image > Mode > Indexed. This will add a bit of dithered grit to the image.

Step 21a (oops again):
Select Generate Optimum Palette, put 255 as the maximum number of colors, set the color dithering to Positioned, and hit Convert when done.

Step 22:
Go to Image > Mode > RGB.
That's it! Export the background and you're done.
You can of course perform other filters to make it look cool (the distort filters are generally a good choice), just do them before each Tile Seamless command.
Click here to return to the index.